The Dreaded Attaching of Handles
Last weeks post was dedicated to the different ways one could make a handle. This week I’m going to give you my method on how to attach the handle. I derived this method from techniques and tips I learned from Nadiege Choplet and Natalia Martinez. This method will work for any style handle that you choose as well as just slip and score attaching clay together.
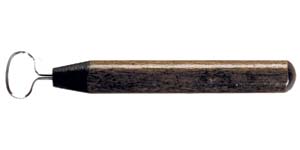
What you will need is a small cup of water, a green scrub pad, a sponge, a modeling tool, pin tool and a paint brush. You probably have most of these already, but when it comes to modeling tools and handles I will recommend this product from Kemper:

You can click the picture for a link to the product and where to buy. (I do not get anything for endorsing it, I just always use it for attaching handles and find it works great.)
So…attaching that handle.
Before you begin, I recommend get a large dry sponge or two to use for resting the mug. It will help keep the shape of the mug as well as allow you to rest your arms.
First, make sure you’ve trimmed your mug and that the clay isn’t crazy dry. It should be a nice leather hardness. Then cover the mug and make your handles in whatever fashion you like. I personally use the Kemper handle maker, Natalia clued me on in this little tool and it is fantastic. It comes in 2 sizes, I use the smaller for mugs and larger for pitchers and other products.
You can click this picture for a link to where to buy as well.
Any way you choose to make your handle is fine. For a commission I had to extrude handles for awhile.

But I prefer the handles made with the handle maker:

So once the handle is made you can shape the handle in advance, but I don’t recommend leaving it to dry too much in that shape. You still want it to be pliable.
Next you want to score the mug in 2 spots where the handle is to be attached, then score the top of the handle. Next you want to add a little water to the score area at the top of the mug, using your brush. Support the mug by having your thumb on the inside of it, behind where you will attach the handle.
With your fingers, smooth out the connection a little bit. Then, you want to determine the arch of the handle, depending on your aesthetic and cut the bottom accordingly. Score the bottom of the handle and add a little water to the scored area on the mug. Then push the bottom of the handle onto the mug and smooth out with your finger.
Now you can rest the mug on the large sponge and use you modeling tool to smooth out as much of the connections as possible.
Once that is smooth, use your brush and little water to smooth the connections further and then go back and use your green scrub pad to really roughly blend the areas. Finally, give it one more blend with your sponge. As I’ve stated in other blogs, I recommend a mudtools sponge.

You are now done with the active part of attaching the handles. Next comes the hardest part, waiting. Make sure to store your mug upside down to allow gravity to help with the arch you created. Store your mugs on a ware board and cover as thoroughly as you can. You are going to want to let these sit at least a week if not more and slowly dry.
Slow drying is critical, because rapid drying might make the connections crack, but worse is that the stress of uneven, rapid drying can make the middle of the handle break completely. So be patient, let the piece dry nice and slow.
Its also a recommendation of mine that you don’t make more that 6 mugs at a time. From personal experience its a psychologically easy number to handle. The monotony of attaching handles doesn’t get to you as badly and its easier to keep 6 mugs moist while attaching handles than say a dozen or more.
So I hope that helps you with your handles. Remember you can use this technique, particularly the blending portion, in all your slipping and scoring. I’ve placed a video of myself below connecting handles in real time so you’ll have a visual reference as well.
Till then, get to the studio and make something!
Questions on the technique, email me at sparanoarts@gmail.com, like what I’m doing feel free to shop my Etsy store


Comments
3 Responses to “The Dreaded Attaching of Handles”Trackbacks
Check out what others are saying...[…] Sparano Arts » Feed: The Dreaded Attaching of Handles […]
LikeLike
[…] to turn it into a pitcher, just re read my post on making handles and you’ll be all […]
LikeLike
[…] essential skills you will need to master to make a pitcher are trimming on a chuck and attaching handles. I’ve also gone over how to do both of these. However, a quick […]
LikeLike