Elevate your cup, make a goblet
First off I will apologize, because no matter what I tried I could not get the video I shot for this post off my phone and working properly. So I will do my best to be as informative as I can about first half of making a goblet.
Second, why you should want to learn to make a goblet. Aside from adding elegance to your bowls, there is a fundamental skill to master here: connecting two thrown bodies of clay together. If you ever want to make sculpture from your thrown work like Paul Soldner:

and take your skills to the next level, you’ll need to master this. Also its a great way of making larger items, like vases, without killing yourself physically by throwing massive amounts of clay. As a matter of fact, many of the classic vase shapes of antiquity:
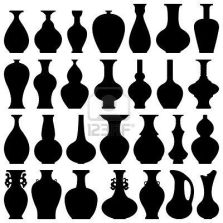
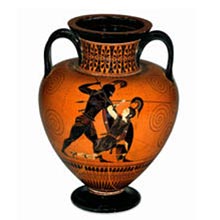
were made by joining corresponding pieces together. So again, its an important skill to master and making goblets are a great place to start.
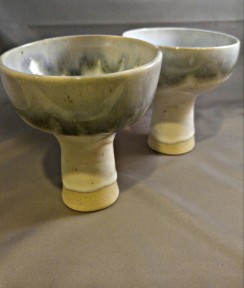
Here is an example of my goblets:
Ok, third: throwing the goblet!
Its really not that hard. Typically I will use 1lb of clay and throw a tea/ice cream bowl. So about 3 inches wide by 3.5 inches tall. Nothing spectacular and if you need a refresher you can always look back on my previous post on bowl making. Now, you don’t need to stick with a round bowl shape for your goblet. You can also do a tall cylinder with a rounded bottom to make more of a champagne flute or a V shaped bowl to create more of a martini glass shape. Its whatever you want it to be, so please experiment and create YOUR goblet.
The difficult part of making a goblet is throwing the stem. Its difficult because you need to throw a small, hollow cylinder and that will lend itself to warping. Typically, I will use 1/2 a pound of clay to start with. The height of the stem is up to you and depends on where you are taking you inspiration from. There are plenty of examples of tall, thin stems:
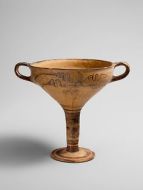
But, they can also be shorter and wider:

I will tell you that short and wide is the easier shape to pull off and if you are still building experience on the wheel, you should try that first. Ultimately though, it is up to you and what you like. Whatever you choose to throw, make sure you have both your wood and rubber rib. They will be the most helpful tool in the process.


If you want to go short and wide, its a simple process. Decide how wide you want to be, throw your clay to a comfortable height and then trim it down to the height you have in mind and compress the rim. If you wan to go tall and thin than I recommend slow steady pressure from the outside, but definite counter balancing with your inside hand. n
Trying to push a cylinder into height and thinness is a guaranteed way of watching the clay warp, twist and rip off. So slow and steady patience is the name of the game here. You can view my youtube channel to see example of me collaring bottle necks to get an idea.
I recommend throwing a couple of stems per bowl. It will help give you some options and allow you to test what looks the best.
Once everything is thrown, store it all together on the same ware board so it can all dry at the same rate. Next week, I’ll go over how to connect the pieces and assemble the goblet. Hopefully, I’ll have some corresponding video for it as well.
Till then, go into the studio and make something.
Questions on the technique, email me at sparanoarts@gmail.com, like what I’m doing feel free to join my email list and get 10% off your next purchase on my Etsy store , make sure to check you spam or gmail promotions folder for the reply email!


Comments
One Response to “Elevate your cup, make a goblet”Trackbacks
Check out what others are saying...[…] In last weeks blog, I discussed the throwing aspect of making a goblet. It should be noted that before I trimmed and joined the two pieces I threw, the pieces were allowed to dry slowly for about a week. Now drying times are never certain and I’ve discussed them before in this blog, but let me go over them again. […]
LikeLike