Proper Preparation
(Make sure to come back to this blog post as I will be adding photos and videos in the future.)
So, we have now gotten past the mental aspects of wheel throwing and are now entering the actual physical act. However, before we get to throwing amazing cups, bowls and vases, you first need to prep your clay.
The first thing is that you have to know what you’re making. For the rest of the article, I’ll make the assumption that you do or that you’ve gone to the above link and read that blog post as well.
So let’s say you want to make a mug. Nothing fancy, just a simple coffee mug. For that product on average you’d want to use 1.25lbs to 1.5lbs of clay. So you need to weigh that out. Keep in mind who the mug is being made for, if its for your Etsy store keep your audience in mind. If you don’t know who your audience is yet, then I recommend making some at 1.25lbs and some at 1.5lbs.
Once everything has been weighed out you need to wedge the clay. There are 2 common methods (that I know of) a European method and an Asian method. I am proficient in the European method, though I have nothing against the Asian method. My overall philosophy is the same as Bruce Lee’s, “Take what works, leave the rest.” If it works for you, stick with it.
The European method is similar to kneading dough. The way I perform it and instruct my students, as well as other student who have had wedging issues, is this: Stand with your feet apart, either right or left foot forward (similar to a running or fighting stance). This will allow you to shift weight between your feet. With hands on both sides you want to push forward with your palms, specifically the part of your palm under your thumb.


Its important you keep your hands on the side of the clay and push diagonally into the clay with outside force (sort of attempting to bring your hands together). This will keep the clay from flattening out and become a coil. As you push forward you want to do so with short bursts and have a rhythm as you do it. I will typically wedge 5 to 6 times per side, then flip the clay onto its side and wedge again. I’ll typically do this 4 to 5 times.
So if you were think of this in workout terms, 4 to 5 sets of 5 to 6 reps.
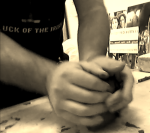
Here’s an example of me wedging.
The short bursts should come mostly from your forearms and projected with a flick of your wrists. The short burst will also make sure your don’t fold air bubbles into the clay, which negates the whole purpose of wedging.
If you’re new to pottery I recommend by starting with something the size of your fist. If you have some experience go bigger. To go bigger, your stance now comes into play. With your forward push you want to rock your body weight forward into you lead foot. As you pull the clay back, shift your weight to the back foot. This will create a rocking motion that will enable you to use your body weight to wedge large amount of clay.
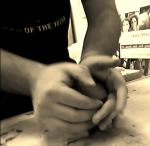
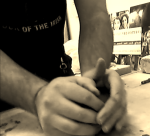
Here’s another example of wedging from above.
If I have one BIG tip about wedging, don’t cut your clay in half to see if its wedged, because now you have to wedge it again. If you cut it in half every time to check, you’ll never be done. Stick to the basic routine I gave you above.
But what about air bubbles?
You can always pop them after your done throwing, and if they are in the base, you’re going to trim the piece aren’t you? Trust me when I tell you its more important to get the hours in on the wheel then it is to make something perfectly.
So with that, get to wedging and make something.
Become a patron and help me spread ceramic education: https://www.patreon.com/sparanoarts Like what I’m doing feel free to shop my Etsy store


Comments
One Response to “Proper Preparation”Trackbacks
Check out what others are saying...[…] already following this blog. The reason being, is that I discuss fundamental strategies and preparation techniques that will set you up for […]
LikeLike